Progeny Dental X-ray troubleshooting typically involves checking connections, ensuring proper settings, and verifying software updates. For persistent issues, consult the user manual or contact customer support.
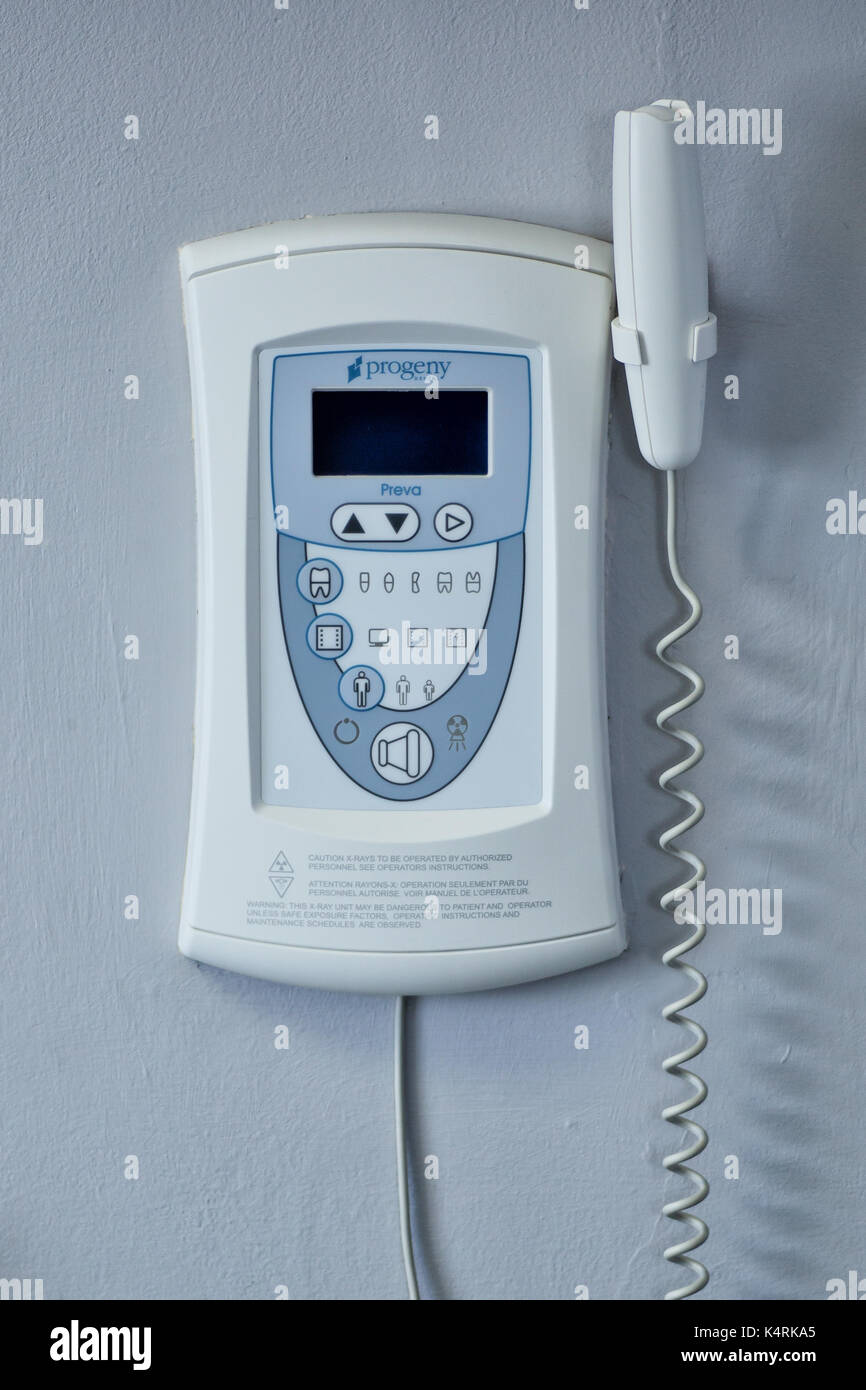
Progeny Dental X-ray machines are essential tools for modern dental practices, providing high-quality imaging for accurate diagnoses. Despite their reliability, users may encounter occasional technical issues that can disrupt workflow. Understanding common problems and their solutions can save valuable time and ensure smooth operation.
Many troubleshooting steps are straightforward and can be performed without specialized knowledge. Regular maintenance and software updates also play a crucial role in preventing issues. This guide will explore common Progeny Dental X-ray problems and effective troubleshooting techniques to enhance your practice’s efficiency and ensure patient safety.
Introduction To Progeny Dental X-ray Systems
Progeny Dental X-Ray systems play a vital role in modern dentistry. These systems help dentists find problems quickly. They improve patient care and treatment planning.
Importance In Dental Diagnostics
Dental X-Rays are essential tools for diagnosis. They allow dentists to see inside the teeth and gums.
- Detect cavities before they grow.
- Identify gum disease early.
- Plan treatments accurately.
- Monitor the development of teeth.
Progeny systems provide high-quality images. This clarity helps in making better decisions for patient care.
Common Models And Features
Progeny offers several models of X-Ray systems. Each model has unique features to meet different needs.
| Model | Features |
|---|---|
| Progeny 3D |
|
| Progeny 2D |
|
Choosing the right model depends on your practice needs. Progeny systems are designed for efficiency and reliability.
Initial Setup Challenges
Setting up your Progeny Dental X-ray system can be daunting. Many users face obstacles during installation and calibration. Understanding these challenges can help streamline the process. Here’s how to tackle common issues effectively.
Proper Installation Procedures
Follow these steps for a successful installation:
- Choose the Right Location: Ensure the area is clean and spacious.
- Check Electrical Connections: Verify that all power sources are functional.
- Install Software: Follow the software instructions precisely.
- Connect Hardware: Use the right cables to connect devices.
- Secure All Components: Ensure everything is tightly fastened.
Initial Calibration Tips
Calibrating your Progeny Dental X-ray system is crucial for accurate results. Follow these tips:
- Run the Calibration Wizard: This tool guides you through calibration.
- Check Sensor Alignment: Ensure sensors are correctly positioned.
- Test Exposure Settings: Adjust settings for optimal image quality.
- Review Calibration Logs: Keep track of calibration history.
Common calibration issues include:
| Issue | Solution |
|---|---|
| Inconsistent Images | Recheck sensor alignment and exposure settings. |
| Software Errors | Restart the program and check for updates. |
| Poor Image Quality | Adjust calibration parameters and retest. |
Common Error Messages
Progeny Dental X Ray systems can show various error messages. Understanding these messages helps you troubleshoot issues quickly. Knowing what each error means saves time and improves workflow.
Decoding Error Codes
Error codes are not just random numbers. They indicate specific problems. Here are some common error messages you might encounter:
| Error Code | Meaning |
|---|---|
| ERR01 | Connection issue with the X Ray unit. |
| ERR02 | Insufficient power supply detected. |
| ERR03 | Software update required for operation. |
| ERR04 | Incorrect sensor placement. |
Each code points to a specific issue. Identifying the correct code is crucial for effective troubleshooting.
First Response Actions
Responding quickly to error messages can prevent further issues. Here are some first response actions:
- Check Connections: Ensure all cables are securely connected.
- Verify Power Supply: Make sure the unit is plugged in.
- Update Software: Follow prompts to update the software.
- Reposition Sensors: Adjust the sensor placement as needed.
Taking these steps may resolve the issue immediately. If problems persist, consult the user manual or contact support.
Power Issues And Solutions
Progeny Dental X-Ray machines may face power issues. Understanding these challenges helps prevent downtime. Here are solutions to common power-related problems.
Troubleshooting Power Failures
Power failures can disrupt your workflow. Follow these steps to troubleshoot:
- Check Power Source: Ensure the outlet is functional.
- Inspect Cables: Look for any damaged or frayed cords.
- Examine Power Switch: Ensure the power switch is on.
- Reset the Device: Unplug, wait a minute, then plug it back in.
- Check Circuit Breaker: Ensure the circuit hasn’t tripped.
Ensuring Reliable Power Supply
A stable power supply is crucial for your X-Ray machine. Here are tips to maintain it:
- Use Surge Protectors: Protect against voltage spikes.
- Regular Maintenance: Schedule routine checks for the machine.
- Upgrade Electrical Systems: Ensure your electrical setup meets the machine’s needs.
- Monitor Power Usage: Keep track of power consumption.
By following these steps, you can ensure your Progeny Dental X-Ray operates smoothly. Addressing power issues promptly helps maintain productivity.
Image Quality Concerns
Image quality is crucial for accurate dental diagnoses. Poor images can lead to misinterpretation. Understanding common issues helps in troubleshooting effectively.
Addressing Poor Image Resolution
Low image resolution can obscure details. Here are steps to improve it:
- Check the sensor alignment.
- Ensure the exposure time is set correctly.
- Keep the dental X-ray machine clean.
Improving resolution enhances diagnostic capability. Use high-quality sensors for better images.
Fixing Overexposure And Underexposure
Overexposed images appear too bright. Underexposed images look too dark. Here’s how to fix them:
| Issue | Solution |
|---|---|
| Overexposure |
|
| Underexposure |
|
Correct exposure is vital for clear images. Regularly calibrate your X-ray equipment.
Software Glitches And Updates
Software glitches can disrupt your Progeny Dental X-Ray system. Regular updates fix bugs and improve performance. Understanding how to troubleshoot these issues is crucial for smooth operations.
Resolving Software Hiccups
Software hiccups can happen unexpectedly. Follow these steps to resolve them:
- Restart the Software: Close and reopen the application.
- Check Internet Connection: Ensure you have a stable connection.
- Clear Cache: Go to settings and clear the cache.
- Reinstall Software: Uninstall and reinstall the application.
Perform these steps carefully. They often solve common software problems.
Navigating Update Procedures
Keeping your software updated is essential. Follow these simple steps:
- Open the Progeny Dental software.
- Go to the settings menu.
- Select the Update option.
- Follow the prompts to install the latest version.
Check for updates regularly. This practice helps maintain optimal performance.
| Update Type | Description |
|---|---|
| Minor Updates | Fixes bugs and improves performance. |
| Major Updates | Adds new features and enhancements. |
Stay informed about updates. This ensures you use the latest features.
Hardware Malfunctions
Hardware malfunctions can disrupt dental imaging. These issues lead to poor-quality X-rays. Identifying and fixing them quickly is essential for patient care.
Identifying Hardware Failures
Recognizing hardware failures helps maintain consistent performance. Here are common signs:
- Unresponsive Controls: Buttons or screens do not react.
- Image Distortion: Blurred or unclear X-ray images.
- No Power: The machine does not turn on.
- Unusual Noises: Clicking or grinding sounds during operation.
Check connections and cables first. Loose or damaged cables often cause issues. A quick visual inspection can save time.
Replacement And Repair Options
When hardware fails, consider these options:
| Option | Description | Cost |
|---|---|---|
| Repair Service | Professional technicians fix the malfunction. | Varies |
| Parts Replacement | Replace faulty components like sensors. | Moderate |
| New Equipment | Purchase a new X-ray machine. | High |
Evaluate costs against the machine’s age. Older machines may need more repairs. Investing in new equipment can save money long-term.

Credit: m.youtube.com
Regular Maintenance Tips
Maintaining Progeny Dental X-Ray equipment ensures optimal performance. Regular upkeep prevents issues and extends equipment life. Follow these guidelines for effective maintenance.
Routine Cleaning Guidelines
Cleaning your Progeny Dental X-Ray equipment is crucial. Follow these simple steps:
- Use a soft, lint-free cloth to wipe surfaces.
- Avoid harsh chemicals. Use mild soap and water.
- Clean the sensor with a dedicated cleaning solution.
- Inspect all cables for wear and tear.
Schedule regular cleaning sessions. Weekly cleaning keeps equipment in top shape. Document each cleaning session for reference.
Preventive Care Practices
Implement preventive care to avoid future problems. Here are essential practices:
- Check the calibration monthly.
- Update software regularly.
- Inspect the power supply for issues.
- Ensure all connections are secure.
Keeping a maintenance log helps track issues. Always follow the manufacturer’s guidelines for care. This practice ensures reliable performance.
Professional Support And Services
Progeny Dental X-Ray systems need care. Professional support can solve many issues. Quick assistance saves time and improves workflow.
When To Call For Help
Some problems require expert help. Here are situations when you should call:
- Equipment does not turn on.
- Images are unclear or missing.
- Software errors appear frequently.
- Physical damage is visible.
- Calibration issues arise.
Contact a professional to ensure the system works well. Early intervention can save costs and time.
Warranty And Professional Repairs
Understanding your warranty is crucial. Progeny offers warranty options to cover repairs.
| Warranty Type | Duration | Coverage |
|---|---|---|
| Standard Warranty | 1 Year | Parts and labor |
| Extended Warranty | 2-3 Years | Parts, labor, and additional support |
Read the warranty terms carefully. Know what is included and excluded. Professional repairs ensure safety and functionality.
Credit: acmerevival.com
Advanced Troubleshooting Techniques
Understanding how to troubleshoot Progeny Dental X-ray issues is crucial. Using advanced techniques helps ensure quick and effective solutions. This section covers essential diagnostic tools and expert-level fixes.
In-depth Diagnostic Tools
Utilizing the right diagnostic tools can simplify troubleshooting. Here are some key tools:
- Diagnostic Software: Tracks errors and suggests fixes.
- Calibration Tools: Ensures accurate image quality.
- Power Meters: Measures energy supply to the device.
Consider the following table for quick reference:
| Tool | Purpose |
|---|---|
| Diagnostic Software | Tracks errors |
| Calibration Tools | Ensures image quality |
| Power Meters | Measures energy supply |
Expert-level Fixes
Implementing expert-level fixes can resolve complex issues. Follow these steps:
- Check Connections: Ensure all cables are secure.
- Update Software: Install the latest version.
- Adjust Settings: Calibrate exposure and contrast.
- Inspect Components: Look for wear and tear.
- Test Equipment: Use backup devices to isolate issues.
For common problems, refer to this list:
- Image not appearing: Check power supply.
- Poor image quality: Adjust calibration settings.
- Software crashes: Reboot and reinstall if necessary.
Creating A Troubleshooting Guide
A troubleshooting guide is essential for Progeny Dental X-Ray systems. It helps staff quickly identify and resolve issues. A well-structured guide saves time and enhances efficiency. Here, we will explore how to document issues and train staff effectively.
Documenting Issues And Solutions
Documentation is crucial for troubleshooting. A clear record helps understand recurring problems. Use the following format for each issue:
| Issue | Possible Causes | Solutions |
|---|---|---|
| Image Not Clear | – Incorrect settings – Equipment malfunction | – Adjust settings – Check equipment |
| No Power | – Power cable unplugged – Faulty outlet | – Reconnect cable – Try a different outlet |
| Software Error | – Outdated software – Corrupted files | – Update software – Reinstall if necessary |
Regularly update this document. Encourage staff to contribute their findings. This practice fosters teamwork and improves problem-solving skills.
Training Staff For Quick Fixes
Training staff on troubleshooting is vital. Knowledgeable staff can solve issues quickly. Conduct regular training sessions. Focus on common problems and their solutions.
- Demonstrate equipment use.
- Walk through troubleshooting steps.
- Encourage questions and discussions.
Use visual aids during training. Charts and diagrams simplify complex concepts. Consider creating quick-reference guides. These can be handy during busy hours.
Establish a feedback loop. Staff can share what works and what doesn’t. This ongoing learning process keeps the team sharp. Empower your team to handle issues with confidence.
Credit: www.alamy.com
Frequently Asked Questions
What Are Common Progeny Dental X-ray Issues?
Common issues include unclear images, equipment malfunctions, and exposure problems. To troubleshoot, check connections, inspect the sensor, and verify settings. Regular maintenance also helps prevent these problems. Always consult the user manual for specific guidelines tailored to your device.
How To Fix Unclear Dental X-ray Images?
Unclear images may result from improper positioning or settings. Ensure the X-ray sensor is correctly aligned with the target area. Adjust exposure time and settings according to the manufacturer’s recommendations. If issues persist, inspect the equipment for damage or seek professional assistance.
Why Is My Progeny X-ray Not Connecting?
Connection issues can stem from faulty cables or software glitches. Start by checking all physical connections and ensure the device is powered. Restart the software and device to refresh the connection. If problems continue, consider updating the software or contacting technical support.
How To Clean Progeny Dental X-ray Equipment?
Cleaning your X-ray equipment is crucial for optimal performance. Use a soft, lint-free cloth with a mild disinfectant. Avoid abrasive materials that can scratch surfaces. Regular cleaning helps maintain image quality and prolongs the life of the equipment.
Conclusion
Troubleshooting Progeny Dental X-Ray issues can save time and enhance patient care. By following the tips outlined in this guide, you can resolve common problems effectively. Regular maintenance and staying informed about updates will further improve your X-Ray experience. Embrace these strategies to ensure seamless imaging for better dental outcomes.