
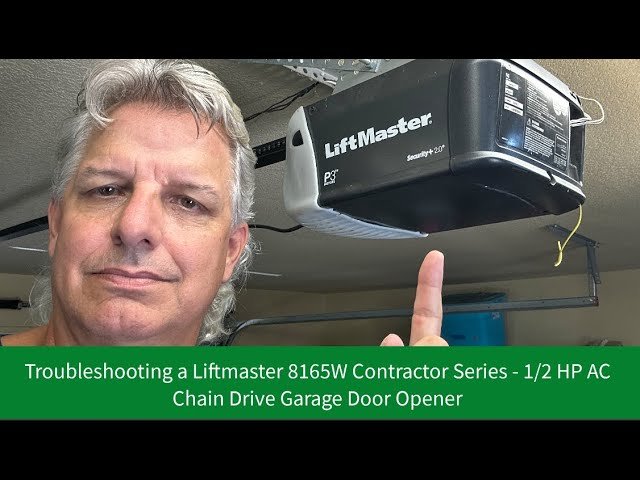
Is your Liftmaster garage door opener giving you trouble? You’re not alone.
Many homeowners face issues with their garage door openers from time to time. Liftmaster is a trusted name in garage door openers, known for their reliability and advanced technology. But even the best systems can have problems. Whether your garage door won’t open, makes strange noises, or the remote isn’t working, these issues can be frustrating.
In this guide, we’ll help you troubleshoot common Liftmaster garage door opener problems. With simple steps and clear instructions, you’ll get your garage door back in working order quickly. Let’s dive into the solutions and get your garage door opener running smoothly again.
Common Issues
Liftmaster garage door openers often face issues like remote control problems and sensor misalignments. Motor malfunctions can also disrupt smooth operation. Regular maintenance helps prevent these common issues.
Garage door openers are essential for convenient access. LiftMaster garage door openers are reliable. Yet, they can face issues. Understanding these problems can help you fix them quickly. Here are some common problems. Sometimes, the remote doesn’t work. Check the batteries first. Dead batteries are a common cause. Ensure the remote is within range. Blockages can affect the signal. Reprogramming the remote may help. Follow the manual for instructions. If it still doesn’t work, the remote might be faulty. Sensors ensure safety. They stop the door from closing on objects. Dirt or debris can block the sensors. Clean them with a soft cloth. Misalignment is another issue. Ensure both sensors face each other. Check the sensor lights. They should be steady, not blinking. If they blink, realign them. Wiring problems can also occur. Inspect the wires for damage. Replace any damaged wires. “`
Credit: www.youtube.com
Basic Checks
Start troubleshooting your Liftmaster garage door opener with basic checks. Ensure the power source is working and the remote batteries are fresh. Verify that the door’s path is clear of obstructions.
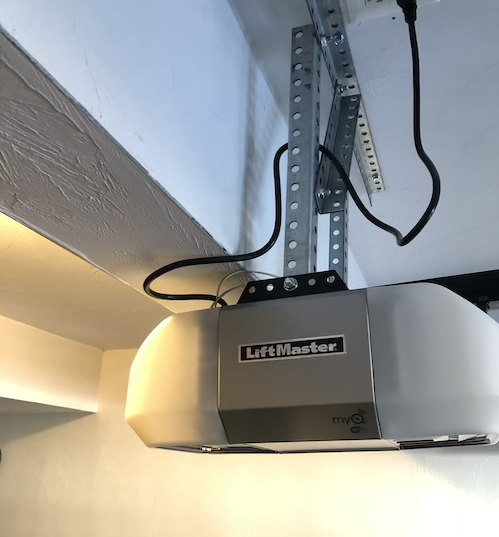
When your Liftmaster garage door opener isn’t working properly, the first step is to perform some basic checks. These simple steps can save you from unnecessary frustration and costly repairs. Let’s dive into two fundamental areas: the power supply and battery inspection.Power Supply
First, check the power source. Ensure the garage door opener is plugged into a working outlet. Sometimes, the solution is as simple as reconnecting a loose plug. Next, inspect the circuit breaker or fuse. A tripped breaker or blown fuse can cut off power to the opener. Reset the breaker or replace the fuse if needed. If these steps don’t resolve the issue, try plugging another device into the same outlet. This will help you confirm if the problem is with the outlet or the opener itself.Battery Inspection
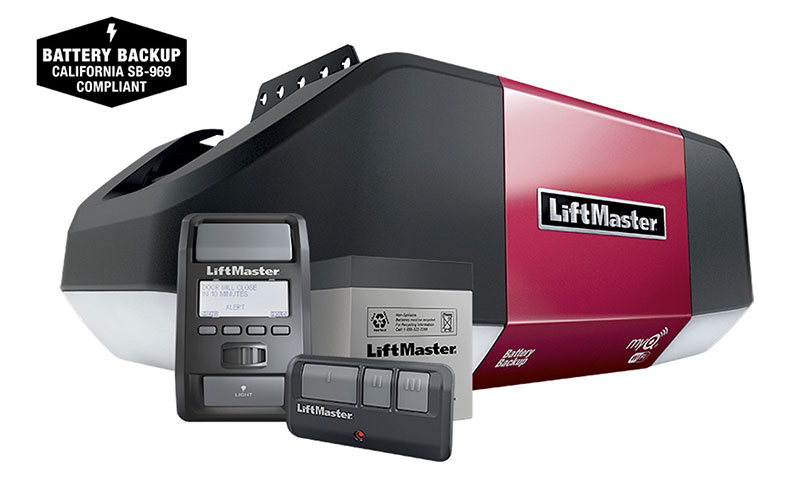
If your opener uses a battery backup, it’s essential to check the battery. A dead or low battery can prevent the opener from functioning correctly. First, locate the battery compartment. It’s usually on the side or the back of the unit. Open it up and inspect the battery for any signs of corrosion or damage. Use a voltmeter to check the battery’s charge. If the voltage is low, replace the battery with a new one. Make sure you use the correct type and size specified by the manufacturer. Have you ever been stuck outside because of a dead garage door opener battery? It’s frustrating, but preventable with regular checks. Make it a habit to inspect your battery every few months. Taking these simple steps can help you troubleshoot common issues with your Liftmaster garage door opener. It’s often the basics that we overlook, yet they can make a big difference. What other simple checks do you think are essential for maintaining your garage door opener?Remote Problems
Experiencing issues with your Liftmaster garage door opener remote? Don’t worry. This is a common problem many homeowners face. Fixing it usually involves simple steps. Let’s explore two main solutions.
Reprogramming Remote
Sometimes, the remote loses its connection to the opener. This can happen due to interference or after replacing batteries. Reprogramming the remote can restore its functionality. First, locate the “Learn” button on the opener. Usually, it is near the antenna. Press and release the “Learn” button. The indicator light will start blinking. Within 30 seconds, press the button on the remote. The light should stop blinking. Test the remote to see if it works.
Replacing Batteries
If the remote still doesn’t work, check the batteries. Dead or weak batteries are a common cause of remote issues. Open the battery compartment on the remote. Remove the old batteries and replace them with new ones. Ensure the batteries are properly aligned. Close the compartment and test the remote again. If the remote works, the problem was the batteries. If not, consider other troubleshooting steps.
Credit: christieoverheaddoor.com
Sensor Malfunctions
Sensor malfunctions can cause your Liftmaster garage door opener to stop working. These issues are often frustrating but are usually easy to fix. In this section, we’ll discuss common sensor problems and how to solve them.
Aligning Sensors
Misaligned sensors can prevent your garage door from closing. To fix this, check if both sensors are facing each other. They should be at the same height on opposite sides of the door. Adjust them carefully until the LED lights on both sensors turn solid. This indicates proper alignment.
Cleaning Sensor Lenses
Dirty sensor lenses can block the signal between sensors. Use a clean cloth to wipe the lenses gently. Ensure there is no dirt or debris on them. Regular cleaning can help maintain their functionality. This simple step can solve many sensor-related issues.
Door Won’t Close
Experiencing issues with your Liftmaster garage door opener? If your door won’t close, check the safety sensors for alignment and obstructions. Ensure the remote batteries are not dead and the opener is properly programmed.
A malfunctioning garage door can be quite frustrating, especially when it refuses to close. Imagine you’re in a hurry, and your Liftmaster garage door won’t budge. It’s a common issue, but with a bit of troubleshooting, you can often solve the problem on your own. Let’s dive into some practical steps you can take to get your garage door back in working order.Obstruction Check
Start with the simplest solution: check for obstructions. Your garage door might not be closing because something is blocking its path. It could be as minor as a small object or dirt on the sensors. Take a moment to inspect the area around the door. Look for any items that might be in the way. Clear any debris or objects that could hinder the door’s movement. Also, clean the photo-eye sensors. These sensors are located near the bottom of the door tracks on either side. They emit an invisible beam that, when broken, prevents the door from closing. Wipe them gently with a soft cloth.Force Settings
If there are no obstructions, the issue might be with the force settings. The force settings control how much force the garage door opener uses to open and close the door. If these settings are off, the door might not close properly. First, locate the force adjustment screws. These are usually on the back or side of the opener. You’ll see two screws labeled “up” and “down” or “open” and “close.” Using a flathead screwdriver, adjust the “down” or “close” force setting. Turn it slightly to increase the force. Test the door to see if it closes properly. Be cautious and make small adjustments. Too much force can damage the door or opener. If you’re unsure, consult your Liftmaster manual for specific guidance. In my experience, a small tweak often solves the issue. Once, my own garage door wouldn’t close, and a slight adjustment to the force settings fixed it instantly. It saved me a service call and a lot of hassle. So, before you call a professional, give these tips a try. You might be surprised at how easy it is to fix the problem yourself. Have you ever faced a similar issue with your garage door? What steps did you take to resolve it? Share your thoughts and let’s help each other out!Motor Issues
Having trouble with your Liftmaster garage door opener? Motor issues can be a common cause. The motor is the heart of the garage door system. It needs proper maintenance and care. If neglected, it can lead to various problems. Below are some tips to address common motor issues.
Lubrication Tips
Proper lubrication is crucial for smooth motor operation. Lubricate the moving parts. This includes the chain, gears, and screws. Use a high-quality lubricant. Avoid using grease, as it can attract dirt and dust. Apply lubricant every six months. This will ensure the motor runs smoothly and quietly. Regular lubrication prevents wear and tear.
Overheating Solutions
Motors can overheat due to excessive use. Overheating can cause the motor to stop working. To prevent this, ensure proper ventilation. Check for any obstructions around the motor. Clean the vents regularly. If the motor overheats, allow it to cool down. Do not force it to run when it’s hot. Inspect for any signs of damage. Replace damaged parts promptly. Regular maintenance can prevent overheating issues.
Noise Reduction
Dealing with a noisy Liftmaster garage door opener can be frustrating. Noise issues can disrupt the peace in your home and indicate potential problems. Let’s dive into practical solutions to reduce that annoying noise.
Tightening Hardware
Loose hardware is a common culprit for noise. Check all the nuts and bolts on your garage door opener.
Use a wrench to tighten them. Don’t overtighten; it could damage the components. Just ensure they are snug.
Pay special attention to the brackets and hinges. These often loosen over time, causing rattling noises.
Have you noticed a specific part of the opener making more noise? Focus on that area first.
Replacing Rollers
Worn-out rollers can also lead to noise. Inspect the rollers on your garage door tracks. If they look worn or cracked, it’s time to replace them.
Nylon rollers are a great choice. They are quieter than metal ones and require less maintenance.
Replacing rollers is straightforward. Unscrew the brackets holding the roller, slide out the old roller, and slide in the new one. Reattach the bracket and ensure it’s secure.
Have you ever noticed how much smoother and quieter a new set of rollers can be? It’s a game-changer.
Addressing these small issues can significantly reduce noise. What other parts of your garage door opener could use some attention?
Professional Help
Dealing with a malfunctioning Liftmaster garage door opener can be frustrating. Sometimes, despite your best efforts, you may need professional help. This section will guide you through the process of finding the right technician and understanding the associated costs.
Finding Technicians
When your garage door opener needs expert attention, finding a reliable technician is key. Start by asking friends or family for recommendations. They may have had similar issues and can point you to a trusted professional.
Alternatively, use online resources. Websites like Yelp and Angie’s List provide reviews and ratings for local services. Look for technicians with high ratings and positive feedback.
Before making a decision, check the technician’s credentials. Ensure they are licensed, insured, and experienced with Liftmaster products. This will give you peace of mind knowing your garage door opener is in capable hands.
Cost Considerations
Understanding the cost of repairs helps you avoid surprises. Repair prices can vary based on the issue and the technician’s rates. Simple fixes might cost less, while complex problems could be more expensive.
Get multiple quotes from different technicians. This will help you compare prices and choose the best option for your budget. Remember, the cheapest option isn’t always the best—consider the quality of service as well.
Ask for a detailed estimate before work begins. This should include labor, parts, and any additional fees. A transparent quote helps you understand where your money is going and ensures there are no hidden charges.
Have you ever faced unexpected repair costs? How did you handle it? Share your experiences in the comments below!
Credit: www.liftmaster.com
Frequently Asked Questions
What Does Flashing Light On Liftmaster Garage Door Opener Mean?
A flashing light on a LiftMaster garage door opener usually indicates a problem. It could be an obstruction, misaligned sensors, or a need to reset the unit. Check the manual for specific error codes.
What Causes A Liftmaster Garage Door Opener Not To Work?
A LiftMaster garage door opener may not work due to power issues, dead remote batteries, misaligned sensors, or a malfunctioning motor. Check the power source, replace batteries, realign sensors, or consult a professional for motor issues.
Is There A Reset Button On A Liftmaster Garage Door Opener?
No, LiftMaster garage door openers do not have a dedicated reset button. You can reset it by unplugging and replugging the unit.
Will Unplugging A Garage Door Opener Reset It?
Unplugging a garage door opener will not reset it. You need to follow the manufacturer’s instructions for a proper reset.
Conclusion
Fixing a Liftmaster garage door opener can be straightforward. Follow these simple tips. Check the power source first. Look at the remote batteries next. Ensure the sensors are aligned. Tighten any loose parts. Use the manual for guidance. For tough issues, call a professional.
Regular maintenance keeps your opener working well. Troubleshooting doesn’t have to be hard. Save time and effort by following these steps. Your garage door opener will run smoothly again.


