
The most effective way to troubleshoot a Ge RV air conditioner is by following these steps. Here’s a comprehensive guide to troubleshooting and resolving common issues with Ge RV air conditioners.
Ge RV air conditioners are a popular choice for recreational vehicles, providing comfort during hot summer months. However, like any appliance, they can encounter problems that may require troubleshooting. It’s important to resolve these issues promptly to ensure a comfortable and enjoyable travel experience.
This guide will assist you in identifying and troubleshooting common problems with your Ge RV air conditioner. By following these steps, you’ll be able to address issues such as inadequate cooling, strange noises, or malfunctioning controls. Whether you’re a seasoned RV traveler or a newcomer to the world of recreational vehicles, this guide provides a straightforward approach to resolving Ge RV air conditioner problems. Let’s get started!

Credit: www.youtube.com
Common Rv Air Conditioner Issues
When it comes to RV air conditioners, there are a few common issues that can arise and affect their performance. It’s important to be aware of these problems so that you can troubleshoot and fix them promptly, ensuring your RV stays cool and comfortable during your travels. In this article, we will explore the most common RV air conditioner issues and provide some troubleshooting tips to help you get your unit back on track.
Unit Not Cooling Properly
One of the most frustrating problems you may encounter with your RV air conditioner is when it fails to cool the interior properly. There could be several reasons for this issue:
- Dirty air filters: Over time, dust and debris can accumulate in the air filters, restricting airflow and reducing cooling efficiency. Regularly cleaning or replacing the filters can often solve this problem.
- Insufficient power supply: If your RV is not getting enough power, it can affect the performance of your air conditioner. Check the electrical connection and ensure that there are no loose or damaged wires.
- Faulty thermostat: A malfunctioning thermostat can prevent the air conditioner from reaching the desired temperature. Consider replacing the thermostat if it is not functioning correctly.
Unit Not Turning On
If your RV air conditioner is not turning on, there are a few possible causes:
- Power issues: Start by checking the circuit breaker or fuses to ensure they are not tripped or blown. Sometimes, resetting the breaker or replacing the fuse can resolve the problem.
- Power supply problems: Verify that your RV is receiving an adequate power supply. If you are using a generator, make sure it is functioning correctly.
- Motor capacitor failure: The motor capacitor helps start the compressor. If it fails, the air conditioner may not turn on. Consider consulting a professional to replace the capacitor.
Strange Noises Or Smells
If you notice strange noises or smells coming from your RV air conditioner, it is important to address the issue promptly:
- Blocked air vents: Make sure that the air vents are not obstructed by objects or debris. Blocked vents can cause the air conditioner to work harder and create unusual noises.
- Loose components: Over time, the vibrations and movement of an RV can cause connections to become loose. Check for any loose screws, bolts, or fan blades and tighten them as necessary.
- Condensate drain blockage: A clogged condensate drain can lead to water buildup, resulting in mold or mildew growth and unpleasant odors. Clear the drain using a vacuum or pipe cleaner regularly.
Understanding these common issues and their potential causes can help you troubleshoot and resolve problems with your RV air conditioner. However, if you are unsure or unable to fix the problem yourself, it is recommended to seek professional assistance to ensure the proper functioning of your unit.
Troubleshooting Steps For Unit Not Cooling Properly
Is your GE RV air conditioner not cooling your space as effectively as before? It can be frustrating when you’re on the road and you rely on your AC to keep you comfortable. Luckily, there are a few troubleshooting steps you can take to address this issue and get your unit cooling properly again.
Check Thermostat Settings
First, it’s important to check the thermostat settings on your GE RV air conditioner. Ensure that the temperature is set to the desired level and that the cooling mode is selected. Sometimes, the settings may have been inadvertently changed, leading to less effective cooling. If the settings are correct, proceed to the next step.
Clean Or Replace Air Filters
Air filters play a vital role in the proper functioning of any air conditioning unit, including RV air conditioners. Over time, these filters can become clogged with dirt, dust, and debris, obstructing airflow and reducing cooling efficiency. To resolve this issue, locate the air filters in your GE RV air conditioner and clean them thoroughly. If the filters are too dirty or damaged, it’s advisable to replace them with new ones.
Inspect And Clean Condenser Coils
The condenser coils are another critical component of your GE RV air conditioner. These coils are responsible for releasing heat from the refrigerant, allowing the air conditioner to cool the indoor space. However, if the condenser coils are dirty or covered in grime, they won’t be able to dissipate heat efficiently. This can cause the unit to struggle with cooling. To remedy this, inspect the condenser coils and clean them using a soft brush or vacuum cleaner. Removing any dirt or debris will help restore the cooling performance of your GE RV air conditioner.
By following these troubleshooting steps, you can address the issue of your GE RV air conditioner not cooling properly. Whether it’s adjusting the thermostat settings, cleaning or replacing air filters, or inspecting and cleaning condenser coils, these steps will help optimize the cooling efficiency of your unit. Enjoy a comfortable and cool journey on the road!
Troubleshooting Steps For Unit Not Turning On
If your GE RV Air Conditioner is not turning on, there are several potential causes that you can check and troubleshoot before calling for professional assistance. By following these troubleshooting steps, you may be able to identify and resolve the issue on your own.
Check Power Supply
Start by checking the power supply to ensure that the unit is receiving electricity. Here’s what you can do:
- Make sure the RV is properly connected to a power source. Check that the power cord is securely plugged in.
- Verify that there is no issue with the external power supply by testing other appliances or devices on the same circuit.
- Inspect the power cord for any visible damage or fraying. If any issues are found, replace the power cord.
- Check the RV’s circuit breaker to ensure that it hasn’t tripped. If it has, reset it and try turning on the air conditioner again.
Inspect And Replace Fuses Or Circuit Breakers
Next, inspect and replace any fuses or circuit breakers associated with the air conditioner. Here’s how:
- Locate the unit’s fuse box or circuit breaker panel. Refer to the RV’s documentation if you are unsure of its location.
- Inspect each fuse or circuit breaker to check for any signs of damage, such as burnt-out fuses or tripped breakers.
- If you find a faulty fuse, replace it with a new one of the same amperage rating.
- If a circuit breaker has tripped, reset it and attempt to turn on the air conditioner again. If it trips again, there may be an underlying problem that requires professional attention.
Test Capacitor And Motor
The capacitor and motor play crucial roles in the operation of your GE RV Air Conditioner. Here’s how you can test them:
- To test the capacitor, use a multimeter set to the capacitance measurement function. Follow the manufacturer’s instructions on how to safely test the capacitor.
- If the measured capacitance is significantly lower than the rated value, the capacitor may be faulty and should be replaced.
- To test the motor, start by visually inspecting it for any visible damage or signs of wear. Ensure that the motor’s wires are securely connected.
- Use a multimeter set to the resistance measurement function to test the motor’s windings.
- If the motor fails any of the tests or shows signs of damage, it may require professional repair or replacement.
By following these troubleshooting steps for a unit not turning on, you may be able to identify and resolve the issue with your GE RV Air Conditioner. However, if the problem persists or you’re uncomfortable performing these tasks yourself, it’s always advisable to seek professional assistance to avoid any further damage or safety hazards.

Credit: www.youtube.com
Troubleshooting Steps For Strange Noises Or Smells
If you own an RV, it’s essential to keep your air conditioner running smoothly. One common problem that RV owners encounter is strange noises or smells coming from their air conditioner. These issues can be bothersome and may indicate a more significant problem. To help you address these concerns, we have compiled a list of troubleshooting steps to identify and resolve the issue.
Identify Unusual Sounds
When your RV air conditioner is making strange sounds, it can be a cause for concern. Here are some steps to help identify the source of the noise:
- Start by turning off the air conditioner to ensure your safety.
- Inspect the exterior of the unit for any loose or damaged parts.
- Remove any debris, such as leaves or twigs, that may have accumulated around the unit.
- Check the fan blades for signs of wear or damage.
- If you notice any loose or damaged parts, tighten or replace them accordingly.
- Turn on the air conditioner again and listen for any unusual sounds.
Inspect And Clean Fan Blades
The fan blades of your RV air conditioner play a crucial role in moving air across the condenser coils to facilitate cooling. Over time, the blades can accumulate dust and debris, leading to issues such as unusual noises and reduced airflow. Follow these steps to inspect and clean the fan blades:
- Start by turning off the air conditioner to ensure your safety.
- Access the unit’s interior by removing the air conditioner cover or grill.
- Locate the fan blades near the condenser coils.
- Visually inspect the blades for any signs of dirt, dust, or damage.
- Using a soft brush or cloth, carefully clean the blades to remove any debris.
- Ensure that the blades are securely in place.
- Replace the air conditioner cover or grill.
- Turn on the air conditioner again and listen for any unusual sounds.
Check For Refrigerant Leaks
In some cases, strange smells emanating from your RV air conditioner may indicate a refrigerant leak. Here are the steps to check for potential leaks:
- Start by turning off the air conditioner to ensure your safety.
- Inspect the unit’s refrigerant lines for any signs of leakage, such as oil stains or wetness.
- If you detect a refrigerant leak, it’s crucial to contact a professional technician for repairs.
- Do not attempt to repair the leak yourself, as handling refrigerants can be dangerous and require specialized skills.
- Once the leak is fixed, the strange smell should dissipate.
- Turn on the air conditioner again and check for any unusual smells.
By following these troubleshooting steps for strange noises or smells, you can address potential issues with your RV air conditioner and ensure its optimal performance. If these troubleshooting steps do not resolve the problem, it is recommended to consult a professional technician for further inspection and repair.
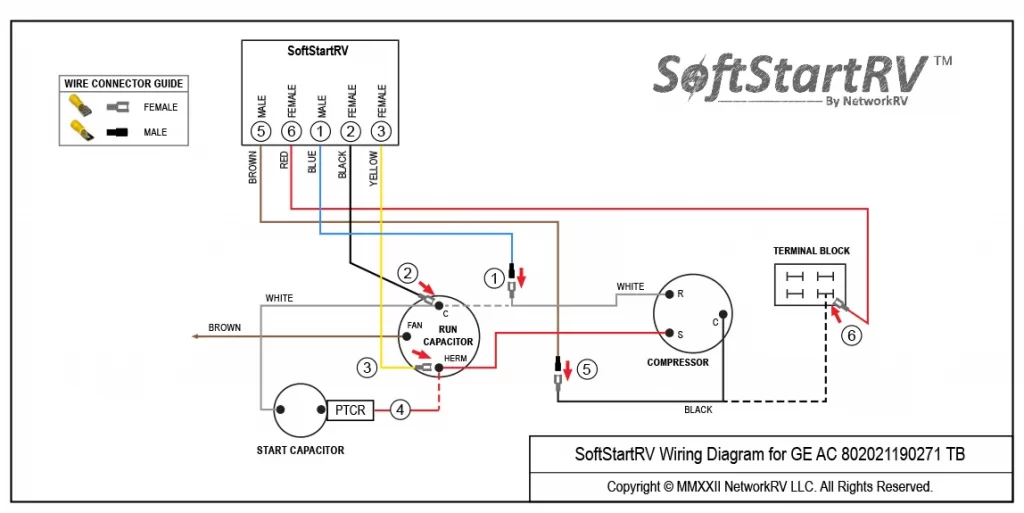
Credit: www.softstartrv.com
Frequently Asked Questions Of Ge Rv Air Conditioner Troubleshooting
How Do I Troubleshoot My Ge Rv Air Conditioner Not Cooling?
To troubleshoot a GE RV air conditioner that is not cooling, check if the temperature is set correctly, clean or replace the air filter, ensure proper air flow around the unit, and check for any obstructions or leaks in the system.
If the issue persists, it is recommended to contact a professional technician for further assistance.
Why Is My Ge Rv Air Conditioner Making Strange Noises?
Strange noises coming from your GE RV air conditioner may be due to a variety of reasons, including loose or worn-out fan blades, debris stuck in the unit, problems with the motor or compressor, or a faulty fan motor. It is best to turn off the unit and consult a technician to diagnose and fix the issue.
How Can I Fix A Leaking Ge Rv Air Conditioner?
If your GE RV air conditioner is leaking, first ensure that the unit is properly installed and leveled. Check for any clogged drain holes or damaged drainage pipes, and clean or replace them if necessary. If the issue continues, it is advisable to seek professional help to identify and fix any internal leaks or damaged components.
What Should I Do If My Ge Rv Air Conditioner Is Not Turning On?
If your GE RV air conditioner is not turning on, first check if it is properly plugged in and the power supply is functioning. Ensure that the temperature is set correctly and the thermostat is not defective. If the issue persists, consult a professional technician to diagnose any electrical faults or underlying issues with the unit.
Conclusion
To troubleshoot your GE RV air conditioner effectively, start by checking the power connection, air filters, and thermostat settings. Don’t forget to inspect the condenser coils and give them a thorough cleaning. Regular maintenance, such as cleaning and replacing filters, can go a long way in keeping your RV air conditioner in top condition.
By following these troubleshooting steps, you can ensure efficient cooling and a comfortable RV experience.


